What's new in The Falklands War: 1982
What's new in The Star and the Crescent
How to Add a Vehicle to the Database
A vehicle object in the database contains all of the data defining a vehicle type, including its special capabilities, its starting ammo, its speed and dimensions. Each unit in the game refers to a vehicle in the database and derives its capabilities from the vehicle object in the database.
We are going to build a UH-60L by copying an OH-58D to a new vehicle object and changing its attributes. You can also make a vehicle by starting from scratch, but you must then manually input all of the Kill Odds data for every weapon in the game. This is not the preferred method for creating a vehicle.
Create a vehicle:
We are going to build a vehicle by copying an existing vehicle to a new vehicle object. Then we are going to edit the copied vehicle to reflect the properties we want it to have.
|
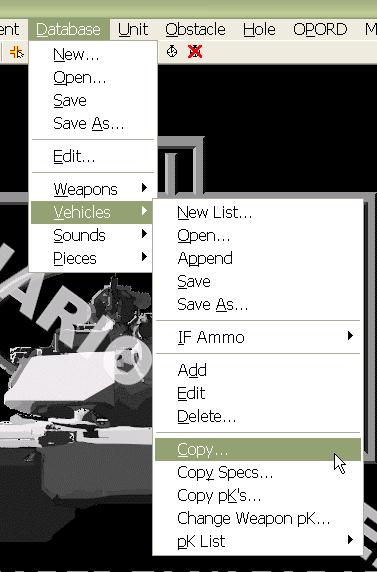
1. Select the 'Copy...' function from the 'Vehicle' sub-menu of the 'Database' menu in the ATF Power Toolkit. |
|
|
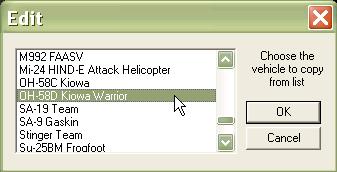
2. Select the vehicle you wish to copy. Ideally, you select a vehicle which has similar vulnerabilities to direct fire weapons. Kill Odds are time consuming to edit, so if you can start with a close match, you will save time. |
|
|
3. Select 'No'. |
|
|
4. Select a name for your new vehicle. |
|
|
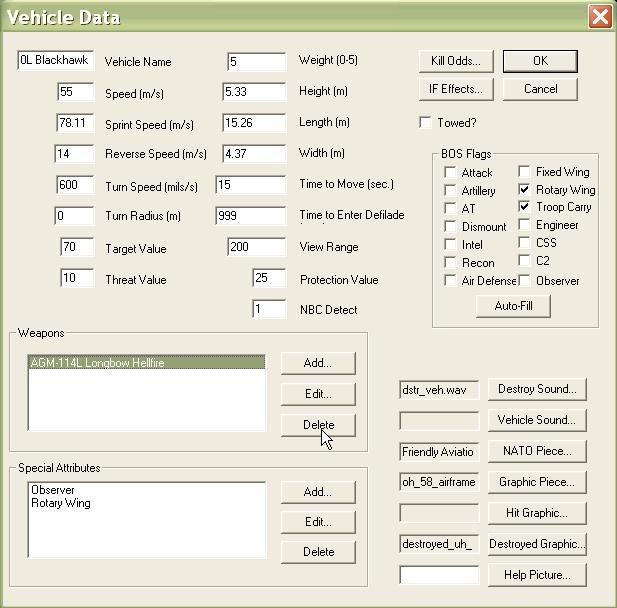
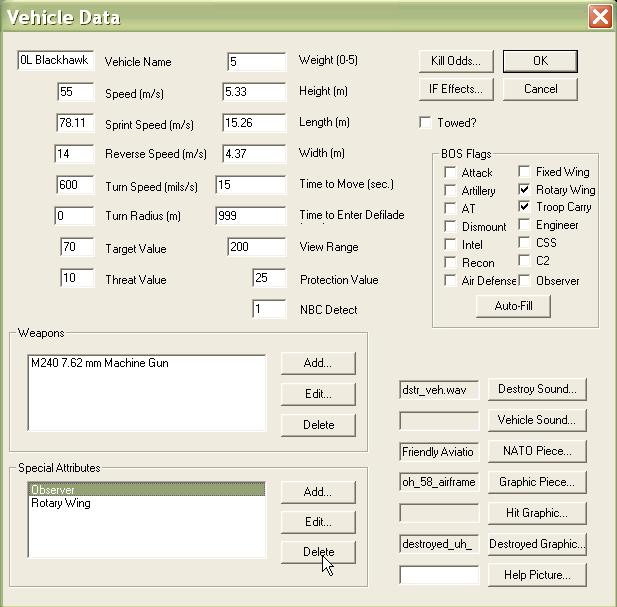
5. Fill in the edit boxes for the vehicle data.
Finally, we delete the old weapon and click 'Add' to add a new weapon to the vehicle. |
|
|
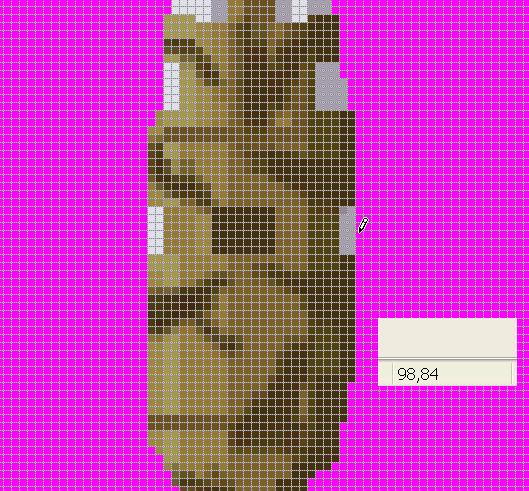
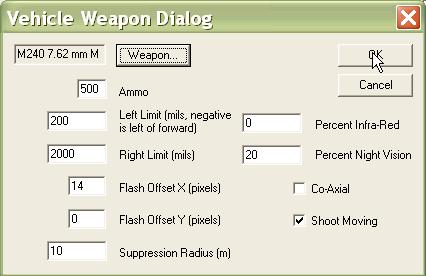
6. Go back to the image for your new vehicle in whatever drawing program you prefer and try to identify the location of weapons on the image. This is the place from which weapons bursts will be shown when the vehicle is firing. On a tank, this might be the turret muzzle, but on our aircraft, this is the door gun. The value you need is from the center of the vehicle (with up being the positive Y axis and right being the positive X axis). In other words, you need to subtract the coordinates of the center from the coordinates of the weapon location and then multiply the Y value by -1 (huh?). This number will be input into the Flash Offset X, and Y for the aircraft. Right now, flash graphics are not implemented. But this may change someday as the Armored Task Force game engine is upgraded, so it is a good idea to input this value so that your vehicle and database will remain 100% compatible when the engine is upgraded. |
|
|
7. We were presented with this dialog when we selected the 'Add' button from the vehicle dialog. If this were a vehicle with a turret, we would add the weapons to the turret, not here, unless they were connected to the chasis of the vehicle, but our aircraft does not have a turret. Click on the 'Weapon' button and select the weapon, then fill out the form.
|
|
|
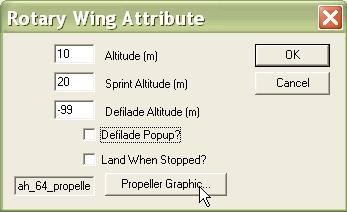
8. We are going to delete the special attributes that do not apply to our aircraft. Then, we select the 'Rotary Wing' item and select 'Edit' so that we can tailor it to our aircraft. |
|
|
9. First we fill out the form:
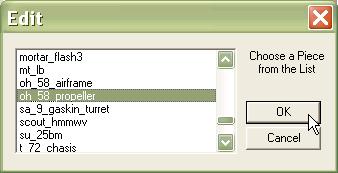
Now we are going to change the propeller graphic... |
|
|
10. Select the UH-60L propeller graphic that you drew using your favorite drawing application. |
|
|
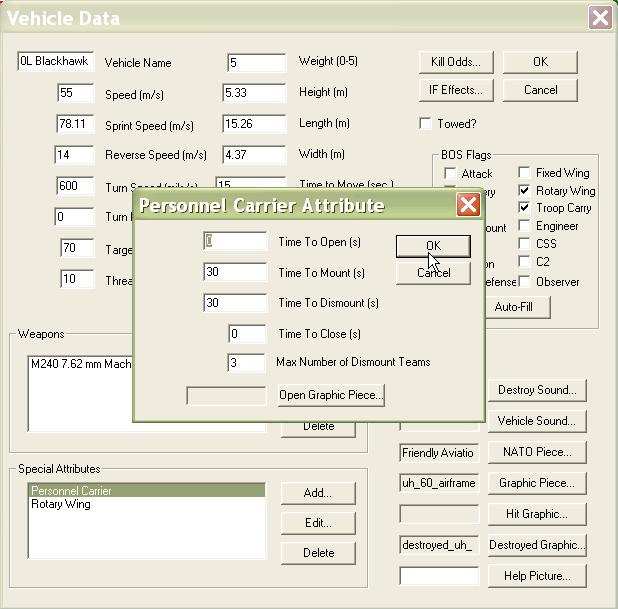
11. After we click 'OK' on the Rotary Wing Attribute dialog, we are going to select the 'Add..." button and select 'Personnel Carrier' so that our aircraft can carry soldiers. We simply fill out the form.
|
|
|
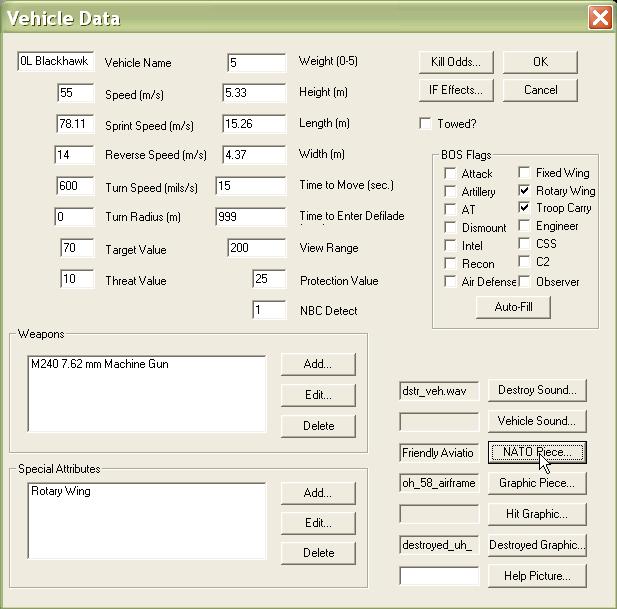
12. Now we will specify the graphics which represent the vehicle on the map. First, we will specify the NATO icon which represents the vehicle by selecting the 'NATO Piece' button... |
|
|
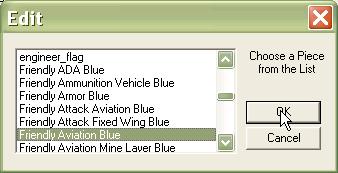
13. ...And specifying the rather generic 'Friendly Aviation Blue'. |
|
|
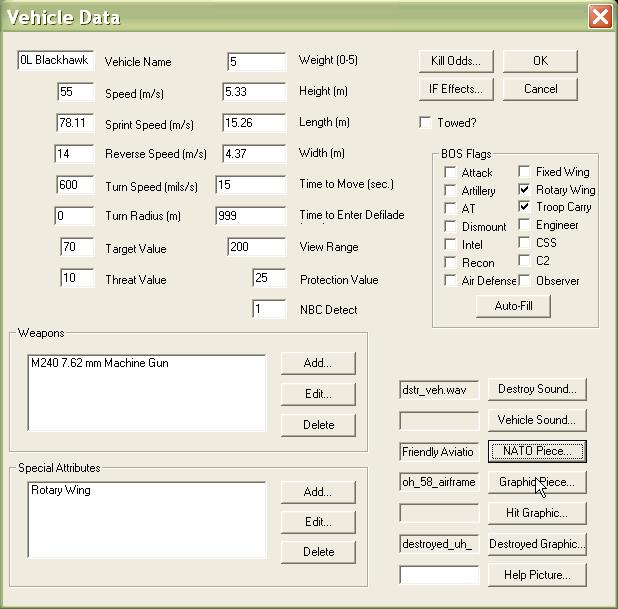
14. Now we are going to pick the graphic piece we created so that, when we have selected 'Vehicle Icons' in our 'View Options' window, our new graphic piece will be displayed. Select 'Graphic Piece' and then select the 'UH-60L' graphic that we created in the previous topic. |
|
|
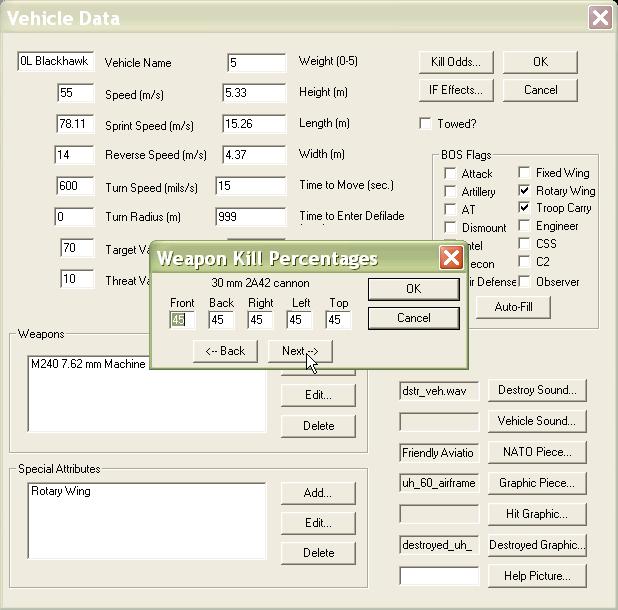
15. If you wish to change the vulnerabilities of the vehicle to direct fire weapons, you can do so by selecting 'Kill Odds'. You will be presented with the 'Weapon Kill Percentages' dialog which allows you to change the pK (percent kill, odds a weapon will kill the vehicle if hit) for each weapon in the database. pK is separate from pH (percent hit, the odds a weapon will hit a vehicle). pH is based on a complicated algorithm and can not be directly edited in the database. It relies on vehicle movement, visibility, weapon magnifications, and many other factors. Here is how to use the dialog.
You can also edit these values by using the 'pK List' functions, 'Import' and 'Export'. With these functions and a program like Microsoft Excel*, you can export all of the current database values, edit them in a tabular format, save them as a comma-separated value list, and import them back into the game. |
|
|
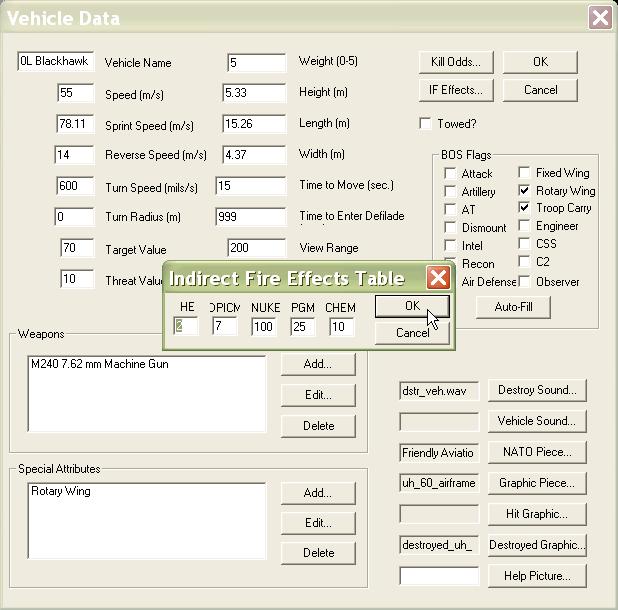
16. You can also edit the vulnerability of your vehicle to indirect fire, by selecting the 'IF Effects' button. These are base pK's (percent kills, odds, from 1-100, that a vehicle will be killed) used if the vehicle is within the blast radius of an indirect fire impact. They are modified by the caliber of the weapon (a rocket will have higher odds than these, while a mortar will have lower odds). The base value here is for a U.S. 155mm round.
|
|
