What's new in The Falklands War: 1982
What's new in The Star and the Crescent
How to Create a New Piece
A piece is a multi-framed image that depicts multiple aspects of a single object. It is used to display a graphic representation of a vehicle on the game map.
This topic demonstrates how to create a piece and add it to a database. To actually make a piece correspond to a vehicle, you must edit the vehicle. For more information on this, see 'Create a new vehicle'.
Create the graphics:
The first step is to create the image that will be displayed on the screen.
|
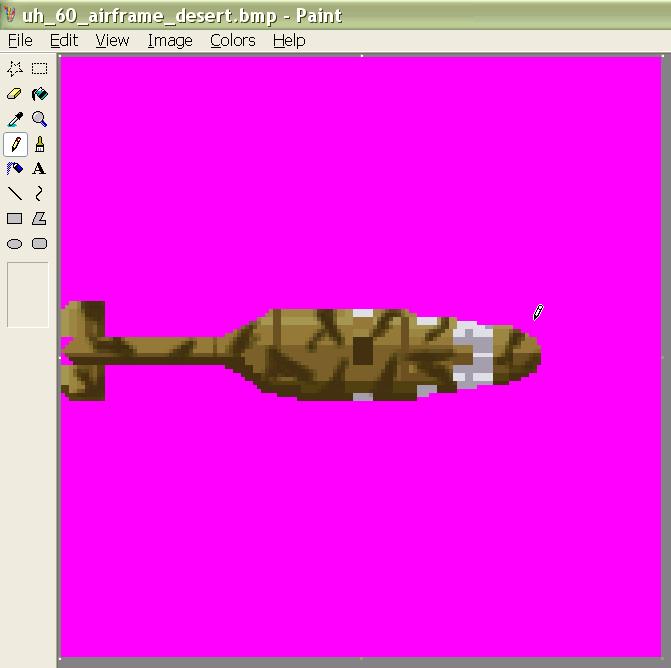
1. Using your favorite drawing application, create a single image of the graphic. If the vehicle has a turret or a propeller (as is the case with our piece), you must put the axis of rotation of the graphic at the center of the image. The background for the image must be 'magenta' (red = 255, blue = 255, green = 0) in order for it not to appear as part of the image when drawn on the screen. |
|
|
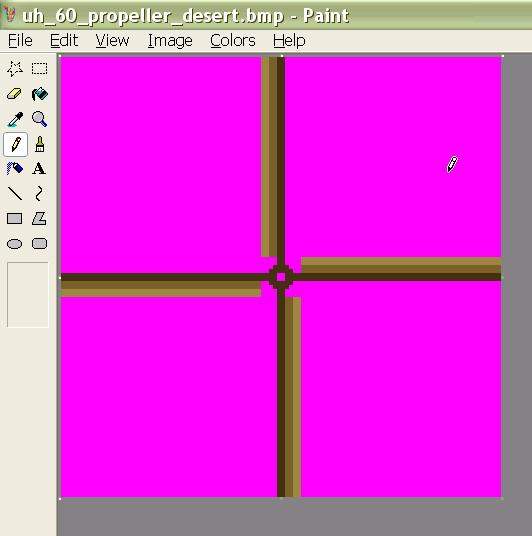
2. We are also going to draw the propeller, as a separate image. Again, we are going to center the axis of rotation of the image in the center of the image so that it will be drawn properly on the screen. |
|
|
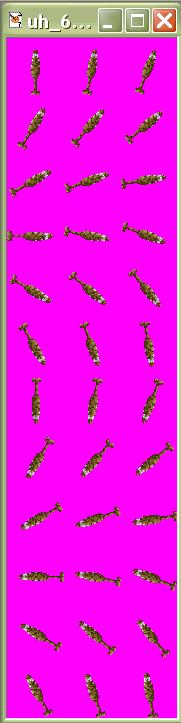
3. We are going to increase the size of the image and copy and rotate it to create frames. The first frame must point north. The other frames should be rotated by equal angles, completely through 360 degrees (the last image should be rotated to the left by a distance of the rotation angle from the first frame). It is very important that this rotation be done without blending the background color into any of the images. Otherwise, an ugly pink border will surround the image when it is drawn in Armored Task Force. The number of frames is not set. you can use any number of frames, as long as they are each rotated by an equal angle. But the more frames you use, smoother rotation of the image will be. We are going to repeat this step for the propeller image. Both images should be saved in the 'Data' subdirectory of the Armored Task Force install directory. The width of the frame should not exceed 640 pixels wide. There is no limit on the height of the image. |
|
Add the piece to the database:
Now that we have built the image, we need to add it to the database. We need to start the ATF Power Toolkit application and open a database to continue.
|
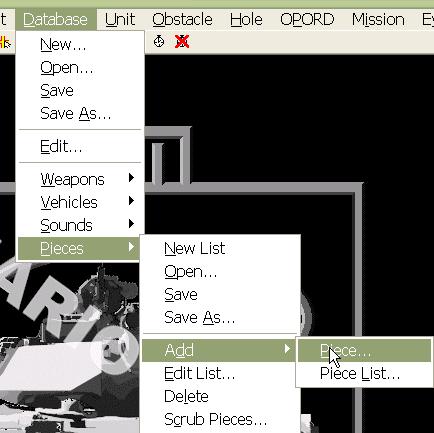
1. Select 'Add Piece...' from the 'Pieces' sub-menu of the 'Database' menu. |
|
|
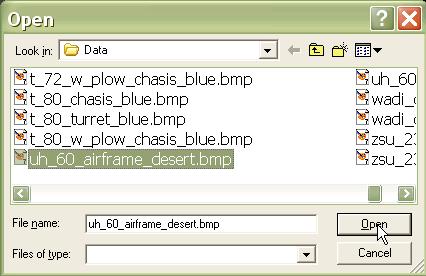
2. Select the image file for the piece you want to add to the database. |
|
|
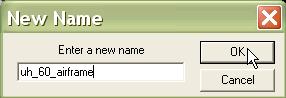
3. Input the name that you will use to reference the piece inside the database. This is the name you will input when prompted for a piece name in the Vehicle Edit dialog in order to display the piece. |
|
|
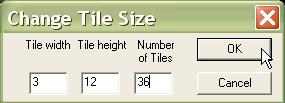
4. You must tell the database how many frames wide and high the source image is, as well as how many total frames are in the image. |
|
|
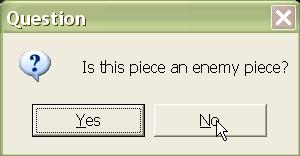
5. You need to tell the database whether this is an enemy piece. If you select 'Yes' the piece will be added as an enemy piece. Selecting 'No' will designate this as a friendly piece. Armored Task Force uses this data to decide whether the player is playing as 'Red' or 'Blue' during a game. If more than half of the player's vehicles are 'Red', icons and dots on the Overview Map will be displayed as Red during game play. |
|