What's new in The Falklands War: 1982
What's new in The Star and the Crescent
How to Create a New Map
One of the most distinctive features of Armored Task Force is its ultra-realistic maps, made from real, GIS topographic data of real locations across the world. Now, with the ATF Power Toolkit, for the first time in any ProSIM Company product, you can build and add your own topographic maps.
The capability to import USGS format DEM's is a highly advanced feature, and well beyond the scope of this Tutorial. It requires an advanced understanding of cartographic principals and GIS data formats. Should you want help doing this, contact us on our web forum. In this tutorial, we will begin with topographic data in the custom, ProSIM Company XDM format. You can download free XDM format data at the Armored Task Force game board, at the web forum.
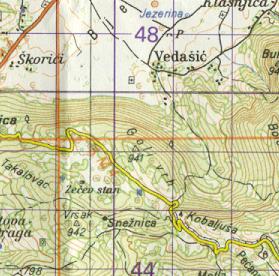
In this tutorial, we are going to try to, as closely as possible, exactly recreate the terrain around Bihac, Bosnia-Herzegovinia. If you wish to create a map without exactly replicating real terrain, you can skip several of the steps in this topic. These steps are indicated as they arise. In order to recreate real terrain you will also need a 1:50,000 or 1:100,000 map of the terrain you wish to replicate. The map (military maps work best) needs to indicate UTM (Universal Transverse Mercador) coordinates, as well as any trees, roads, or other special terrain which are present on the actual terrain.
Create an Elevation Map:
Building Armored Task Force maps requires the ATF Power Toolkit. To continue with the topics in this tutorial, you must open this application.
|
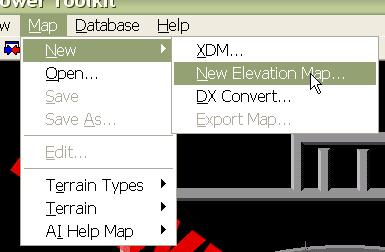
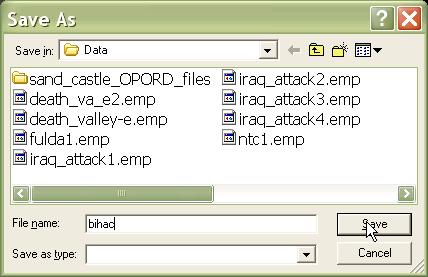
1. Select 'New Elevation Map' from the 'Map' menu in ATF Power Toolkit. |
|
|
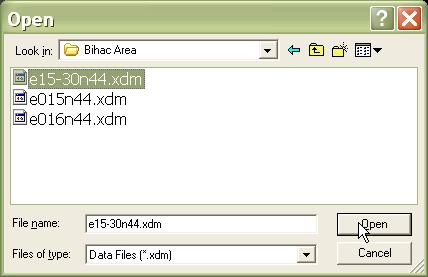
2. You will be prompted for an XDM from which to make the map. If you wished to create a map from a USGS format DEM, you could change the entry in 'Files of type:' to load a DEM. |
|
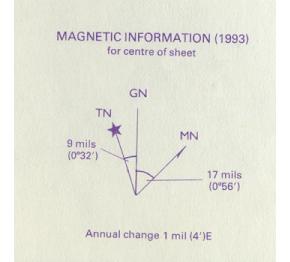
| 3. TO EXACTLY RECREATE REAL TERRAIN
ONLY. Go to the margin information of your 1:50,000 or 1:100,000
map of the terrain and look for the 'Magnetic Information'. We
need to extract the true north (TN) to grid north (GN) angle in
mils. A clockwise angle is positive. A counter-clockwise
angle is negative.
Also, from the margin information, you need to extract the two letter, 100,000 meter grid zone designators for the map. |
|
| 4. TO EXACTLY RECREATE REAL TERRAIN ONLY. Next, we need to figure out how many meters there are in an arc-second of longitude. We need to find tick-marks along the bottom of the map which indicate minutes of longitude (there are sixty arc-seconds in an arc-minute). We are going to measure the number of meters (in map scale) between these tic marks. Then we are going to divide the number of meters by the number of seconds (minutes X 60). This will give us the number of meters per arc-second of longitude. |
|
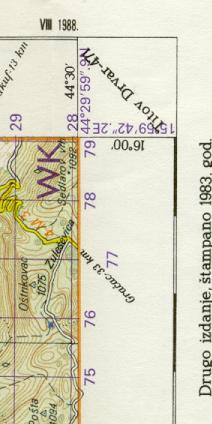
| 5. TO EXACTLY RECREATE REAL TERRAIN
ONLY. We need to find the bottom left corner of the map.
It needs to be at a location where we can determine both the longitude
and latitude AND the UTM grid.
We also need to look at the map and decide the size of the map in meters high and wide. A map of a region like Bihac, with lots of trees and mountains, will bog down the engine if it is much larger than 20 X 20 kilometers. A map of wide open terrain like Saudi Arabia can be much larger. The maximum map size is 50 X 50 km. |
|
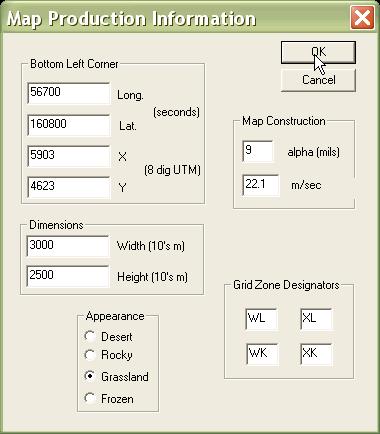
| 6. You will be presented with the 'Map
Production Information' dialog, which allows you to tell the Power
Toolkit how to extract data from the XDM data file you have
selected.
TO EXACTLY RECREATE REAL TERRAIN ONLY. Enter the numbers you have extracted from steps 3-5.
|
|
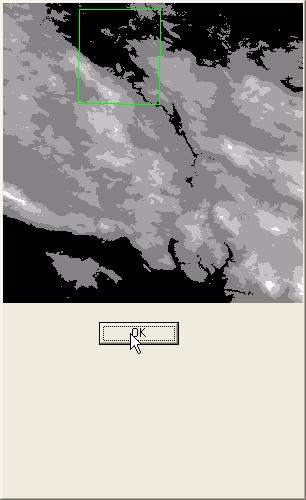
| 7. This preview map indicates the orientation of your new map in the XDM map set. TO EXACTLY RECREATE REAL TERRAIN ONLY. Do not click in this map! Doing this will alter the settings you have made in the previous step and make your map inaccurate. |
|
| 8. ATF Power Toolkit builds
three components. A color map, a contour map, and an elevation
map. However, the contour map and color map must be converted to
DX maps (a ProSIM Company custom format) before they can be
imported into an Armored Task Force game map.
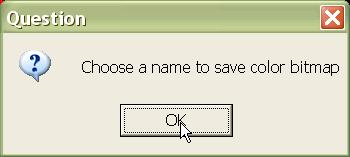
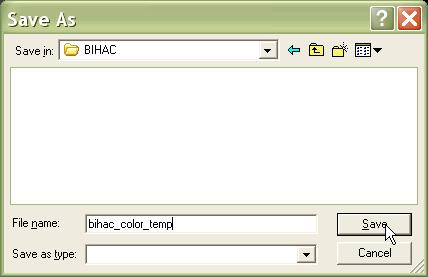
First, you are prompted to provide a name for saving the temporary color map that you will then convert to a DX map. |
|
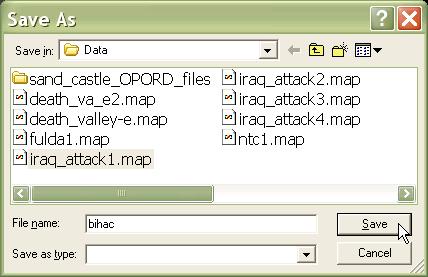
| 9. Provide a name for the custom map. The map must reside in the 'Data' sub-directory of the Armored Task Force install directory in order to be converted by the Power Toolkit. |
|
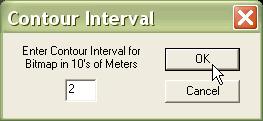
| 10. The contour interval is the vertical difference between contour lines on the contour map. Contour lines connect points of equal elevation on a map. This value is entered in tens of meters. For flat terrain, you may use '1'. For mountainous terrain, you may use anywhere from 2-4. The intent is that the contour map not be so saturated with contour lines that it is unreadable. |
|
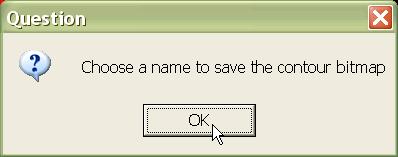
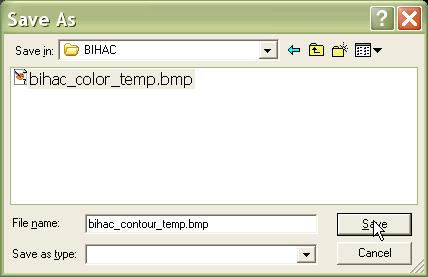
| 11. You must also specify the name for the temporary contour map. |
|
| 12. Again, it must be in the 'Data' sub-directory of the Armored Task Force install directory. |
|
| 13. Next, we must save the elevation map. We recommend that you save all of the final map components with the same file name and different extensions. This makes it easy to identify what maps go with what components. This file must also be in the 'Data' sub-directory of the Armored Task Force install directory to be useable. |
|
Convert Graphic Maps to DX Format Maps:
The maps drawn by the ATF Power Toolkit are normal Windows bitmaps. In order for them to be used by Armored Task Force in game maps, they must be converted to a custom ProSIM Company format called DX format. The format is still a Windows bitmap, but the map is cut up into rectangular sections that can be digested by the Armored Task Force graphics engine.
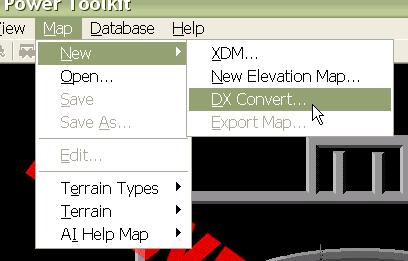
| 1. Select 'New' and 'DX Convert' from the 'Map' menu. |
|
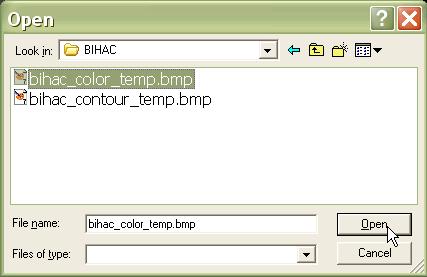
| 2. Select the bitmap which you wish to convert to DX format. |
|
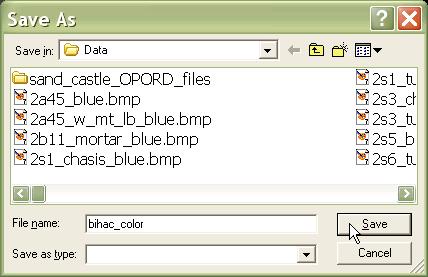
| 3. Select a name with which to save the converted file. Again, we recommend using a name similar to that of the other map files, so that it will be easy to find later. |
|
| 4. The .map file is linked to the DX format map file. It basically tells Armored Task Force how many blocks a DX format file has been chopped into. Again, we recommend a common name with the other game map files. |
|
| 5. ATF Power Toolkit will tell you how many tiles and of what size it has chopped the map into during the conversion. |  |
| 6. The .gmp (game map) file is the top level file for an Armored Task Force map. When you select a map to import into Armored Task Force either from the scenario wizard or the 'Import Map' function, you select a .gmp game map file. Select a name for the game map which corresponds to this map file. |  |
| 7. ATF Power Toolkit is done with the conversion. It asks you if you want to load the game map. Say no, because we have some more work to do first. | 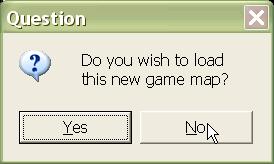 |
| 8. We have completed conversion of the color map. Now, we are going to repeat the process to convert the contour map to DX format. | 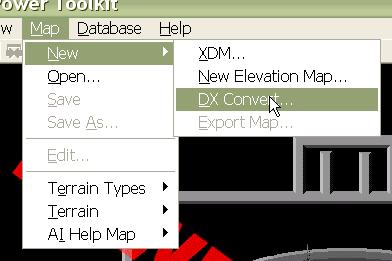 |
| 9. Select the temporary contour map image. | 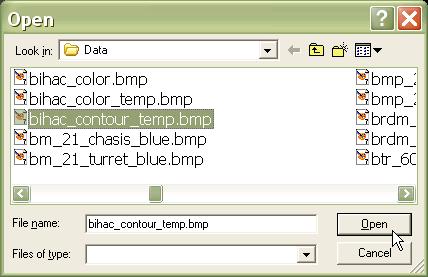 |
| 10. Select a name with which to save the contour map. |  |
| 11. All images of the same size will always be chopped into the same number and size of tiles. Since our color and contour map are both the same size, we can save over the original .map file. | 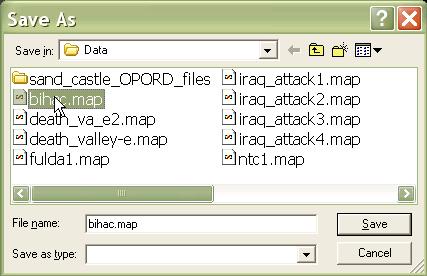 |
| 12. We can also save over the .gmp game map file, since we are going to edit it next, anyway. | 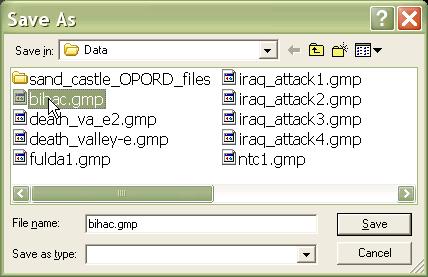 |
Edit the Armored Task Force Game Map:
The only thing left to do is gather all of the pieces we have built into an Armored Task Force game map. The game map (saved in the .gmp file) 'points' to all of the components that make up the game map. In order to continue with this topic, we will assume you have already loaded a game map, either by responding 'yes' to the prompt to do so during the map creation process, or by using 'Open' from the 'Map' menu.
| 1. Select 'Edit' from the 'Map' menu. | 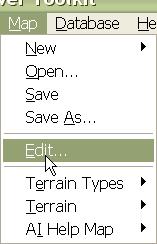 |
| 2. You will be presented with the 'Edit Game Map' dialog. Enter the name of each file which makes of up the game map. For a game map to function correctly in Armored Task Force, it must have an entry in every block except 'AI Help Map'. However, unless you have a map of completely open, completely flat desert, hierarchies will not be able to execute formations or Missions correctly without the help map. | 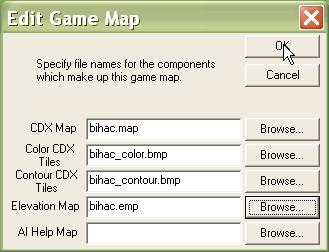 |
| 3. To use a file dialog to select files, click on a 'Browse' button. Select the file name for the file you wish to include in each entry. All of the specified files must be in the 'Data' sub-directory of the Armored Task Force install directory for the game map to load properly. | 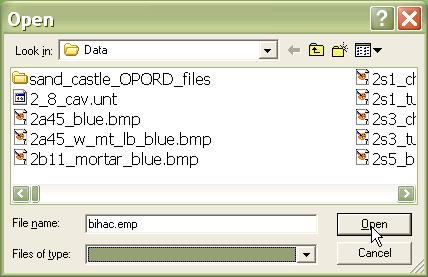 |
Make sure you save the map using 'Save' from the 'Map' menu before continuing.