What's new in The Falklands War: 1982
What's new in The Star and the Crescent
How to Add the Screen Mission
The basic method for building a Faction AI script is to first, plan paths for enemy hierarchies, then plan Missions for enemy hierarchies, and then, finally, create a Faction AI that triggers units to begin movement and execute Missions as triggers are met.
Now that we have planned all of the enemy paths, it is time to continue planning Missions for enemy hierarchies. If an enemy hierarchy, based on the situation, may execute more than one Mission, we must plan multiple Missions for the hierarchy. After each Mission is planned, we will cancel the Mission, so that it is not executed until the proper trigger is met.
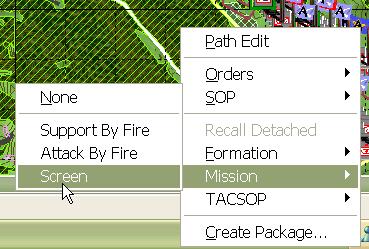
The 'Screen' Mission is used with recon and aviation hierarchies to move to an initial and then subsequent and alternate screen lines based on triggers configured in the mission. You can also configure the triggers so that the hierarchy skips one or both of the secondary positions, in which case the order becomes much like the 'Attack By Fire' mission.
Add the Screen Mission:
|
1. Right-click on the hierarchy for which you wish to plan the mission. Select 'Company Wave Attack to Breach' from the 'Mission' sub-menu. |
|
|
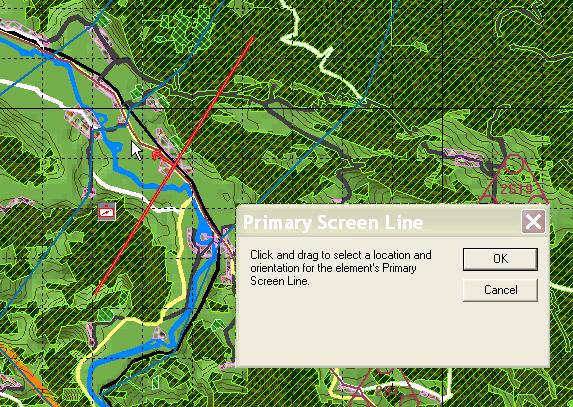
2. Click on the location where you wish to set the first screen line and then, with the left mouse button still down, drag to turn the position to the correct orientation. |
|
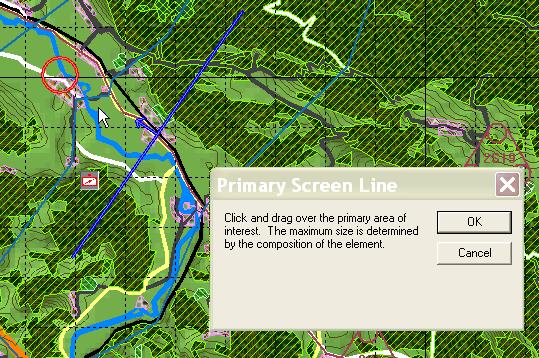
| 3. Drag-click over the area on which you would have the hierarchy orient when it assumes the first screen line. |
 |
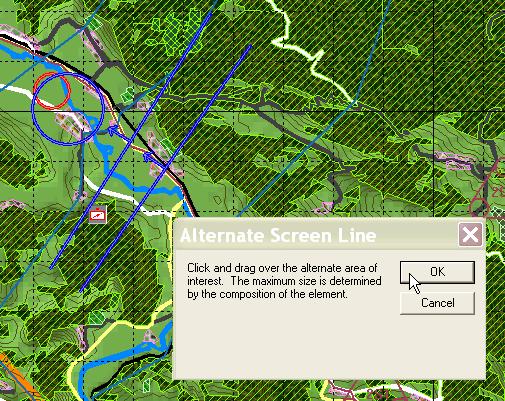
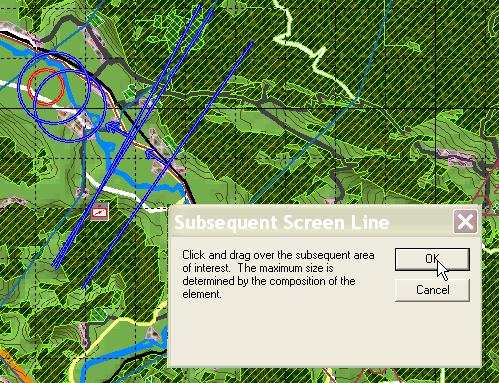
| 4. Click on the location where you wish to set the second screen line and then, with the left mouse button still down, drag to turn the position to the correct orientation. Click 'OK' and then drag-click over the area on which you would have the hierarchy orient when it assumes the second screen line. |
 |
| 5. Click on the location where you wish to set the third screen line and then, with the left mouse button still down, drag to turn the position to the correct orientation. Click 'OK' and then drag-click over the area on which you would have the hierarchy orient when it assumes the third screen line. |
 |
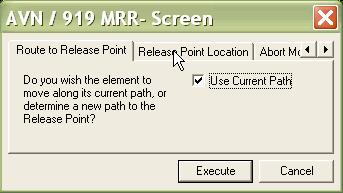
| 6. If this box is checked, the hierarchy will, to the best of its ability, use its current path to reach its first screen line. |
 |
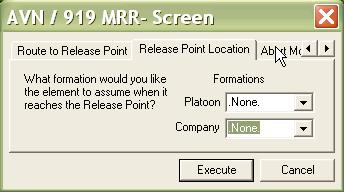
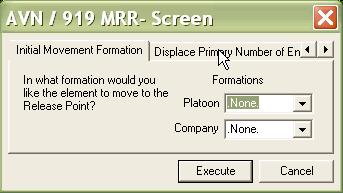
| 7. The hierarchy, based on its size, will use the corresponding entry to determine what formation to assume when it reaches the release point. |
 |
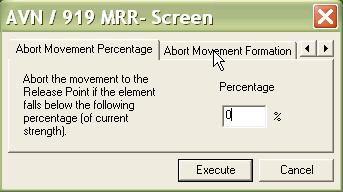
| 8. The hierarchy will abort the screening operation if its forces fall below the given percentage. A zero means the hierarchy will continue until every vehicle is dead. |
 |
| 9. If the hierarchy does abort, this is the formation it will assume. |
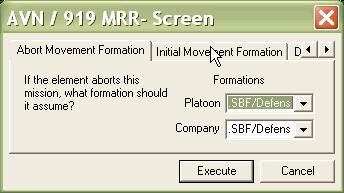 |
| 10. This is the formation the hierarchy will use to move to the Release Point. |
 |
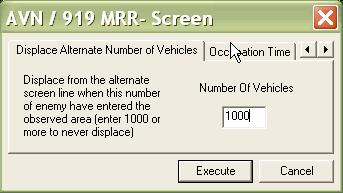
| 11. The hierarchy uses detected enemy as a trigger to displace to the Alternate Screen line. If you set this value to 1000, the hierarchy will never displace, because it will never see 1000 vehicles at one time. |
 |
| 12. The hierarchy also uses detected enemy as a trigger to displace to its subsequent location. This number, in light of the previous step, is irrelevant because the hierarchy will never displace from its primary screen line. |
 |
| 13. If you want the hierarchy to wait before occupying the first screen line, place a time here. |
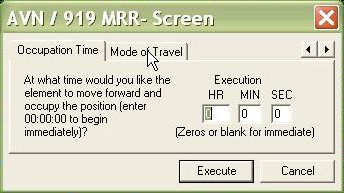 |
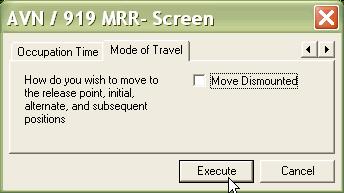
| 14. If this box is checked and the hierarchy has dismounts, they will dismount and walk from the Release Point to the first screen line, and then all subsequent screen lines. |
 |